Recovering Data From An Old Encrypted Time Machine Backup
Recovering data from a backup should be an easy thing to do. At least this is what you expect. Yesterday I had a problem which should have been easy to solve, but it was not. I hope this blog post can help others who face the same problem.

The problem
1. I had an encrypted Time Machine backup which was not used for months2. This backup was not on an official Apple Time Capsule or on a USB HDD, but on a WD MyCloud NAS
3. I needed files from this backup
4. After running out of time I only had SSH access to the macOS, no GUI
The struggle
By default, Time Machine is one of the best and easiest backup solution I have seen. As long as you stick to the default use case, where you have one active backup disk, life is pink and happy. But this was not my case.As always, I started to Google what shall I do. One of the first options recommended that I add the backup disk to Time Machine, and it will automagically show the backup snapshots from the old backup. Instead of this, it did not show the old snapshots but started to create a new backup. Panic button has been pressed, backup canceled, back to Google.

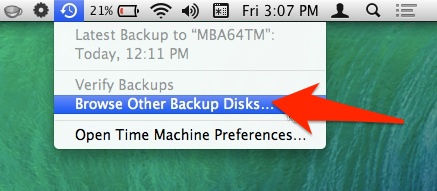
Other tutorials recommend to click on the Time Machine icon and pressing alt (Option) key, where I can choose "Browse other backup disks". But this did not list the old Time Machine backup. It did list the backup when selecting disks in Time Machine preferences, but I already tried and failed that way.
YAT (yet another tutorial) recommended to SSH into the NAS, and browse the backup disk, as it is just a simple directory where I can see all the files. But all the files inside where just a bunch of nonsense, no real directory structure.
YAT (yet another tutorial) recommended that I can just easily browse the content of the backup from the Finder by double-clicking on the sparse bundle file. After clicking on it, I can see the disk image on the left part of the Finder, attached as a new disk.
Well, this is true, but because of some bug, when you connect to the Time Capsule, you don't see the sparse bundle file. And I got inconsistent results, for the WD NAS, double-clicking on the sparse bundle did nothing. For the Time Capsule, it did work.
At this point, I had to leave the location where the backup was present, and I only had remote SSH access. You know, if you can't solve a problem, let's complicate things by restrict yourself in solutions.
Finally, I tried to check out some data forensics blogs, and besides some expensive tools, I could find the solution.
The solution
Finally, a blog post provided the real solution - hdiutil.The best part of hdiutil is that you can provide the read-only flag to it. This can be very awesome when it comes to forensics acquisition.

To mount any NAS via SMB:
mount_smbfs afp://<username>@<NAS_IP>/<Share_for_backup> /<mountpoint>
To mount a Time Capsule share via AFP:
mount_afp afp://any_username:password@<Time_Capsule_IP>/<Share_for_backup> /<mountpoint>
And finally this command should do the job:
hdiutil attach test.sparsebundle -readonly
It is nice that you can provide read-only parameter.
If the backup was encrypted and you don't want to provide the password in a password prompt, use the following:
printf '%s' 'CorrectHorseBatteryStaple' | hdiutil attach test.sparsebundle -stdinpass -readonly
Note: if you receive the error "resource temporarily unavailable", probably another machine is backing up to the device
And now, you can find your backup disk under /Volumes. Happy restoring!
Probably it would have been quicker to either enable the remote GUI, or to physically travel to the system and login locally, but that would spoil the fun.
Related word
- Hacking Apps
- Hacking Tools For Windows Free Download
- Computer Hacker
- Hacker Tools For Ios
- What Is Hacking Tools
- Hacker Tools Hardware
- Pentest Tools For Ubuntu
- Pentest Tools List
- Hacker Tools 2020
- Hacking Tools 2019
- Hacker Tools
- Pentest Tools Subdomain
- Top Pentest Tools
- Hacking Tools Windows
- Nsa Hack Tools
- Hacker Techniques Tools And Incident Handling
- Nsa Hack Tools
- Hacking Tools
- Hack Tools Pc
- Kik Hack Tools
- Hacking Tools Windows 10
- Bluetooth Hacking Tools Kali
- Pentest Tools List
- Pentest Tools Port Scanner
- Android Hack Tools Github
- Hacking Tools And Software
- Hacker Tools Software
- Hacking Tools Software
- New Hack Tools
- Hacker Tools Apk Download
- Hacking Tools
- Hacker Tool Kit
- Pentest Tools Bluekeep
- Free Pentest Tools For Windows
- Hacking Tools For Windows Free Download
- Pentest Tools Android
- Hacking Tools Download
- Hack Tools For Windows
- Pentest Tools Github
- Hacking Tools Github
- Hacking Tools 2019
- Hack Tools Mac
- Hacking Tools For Kali Linux
- Hack And Tools
- Pentest Tools Alternative
- Hacking Apps
- Pentest Tools For Windows
- Pentest Tools Subdomain
- Hacking Tools For Pc
- Pentest Tools Find Subdomains
- Hack Tools Download
- Hacking Tools For Windows Free Download
- Install Pentest Tools Ubuntu
- Hacking Tools Online
- Hacking Tools Software
- Usb Pentest Tools
- Pentest Tools Windows
- Pentest Tools Nmap
- Hacking Tools Pc
- Hacker Tools 2020
- Github Hacking Tools
- Pentest Tools Review
- Hack Tools For Mac
- Tools 4 Hack
- Termux Hacking Tools 2019
- Nsa Hack Tools
- Ethical Hacker Tools
- Pentest Tools Find Subdomains
- Hacker Techniques Tools And Incident Handling
- Pentest Tools Free
- Hacking Tools For Windows Free Download
- Hack Tools For Pc
- Pentest Tools Apk
- Pentest Tools Alternative
- Hacker Tools For Pc
- Hacking Tools And Software
- Hack Tools Mac
- Physical Pentest Tools
- Hacker Tools Github
- Hacker Tool Kit
- Hacking Tools
- Hacker Tools Mac
- Usb Pentest Tools
- Physical Pentest Tools
- Hack Tools Download
- Hacker Tools For Windows
- New Hack Tools
- Pentest Tools Review
- Pentest Tools Free
- Ethical Hacker Tools
- Hacker Tools Free Download
- Top Pentest Tools
- Pentest Tools List
- Hack And Tools
- Tools Used For Hacking
- Hacker Tools Software
- Hack Rom Tools
- Hacker Tools For Mac
- Pentest Tools Free
- Termux Hacking Tools 2019
- Hacking Tools Software
posted by Affiliate Marketer @ 7:57 PM
0 Comments
![]()
![]()